
Please watch our video guides for a quick overview of the process:
Setup Demo 1:
Setup Demo 2:
Note: For Shopify, a 0.2% platform fee will be added to the existing MDR on monthly transactions. Learn more about the fee here.
A. Install DOKU payment
1. Login to your Shopify store.
2. Click here for the DOKU payment app.

3. Click “Add App” to install.
4. You will be redirected to the installation page in Shopify. Review it and click “Install selected app”.
5. You will be redirected to the payment provider page. As a senangPay Merchant, please choose senangPay as the platform payment provider.

6. After you click on the senangPay option, the Credential Form will appear. Insert your senangPay credentials.

7. To get your Merchant ID and Secret Key:
- login to your senangPay dashboard, go to Menu > Settings > Profile.
- On your profile page, scroll down until you see “Shopping Cart Integration Link”.
- Refer to the relevant fields.

8. Click “Confirm” and you will be redirected to Shopify. This page will indicate that your store has been connected to DOKU Payment. To activate, click “Activate DOKU Payment”. Please select these seven payment channels only.
You can also enable or disable test mode and payment channel icons in your store.

9. Now, you’re done! Shopify is ready to process your payments via DOKU.
B. Set up notification URL in senangPay back office
You must set up hash type: SHA256

This notification URL is in your Back Office for each channel. To setup:
- Return the URL in your configuration: https://api.doku.com/middle/v2/shopify/redirect/senang-pay
- Callback URL in your configuration: https://api.doku.com/middle/v2/shopify/notify/senang-pay
Then, go to callback response and choose ‘Ignore the response’.
![]()
C. Make phone number and e-mail compulsory for customers during checkout
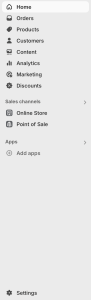
1. Go to Settings.
2. Select “Checkout”.

3. Go to “Customer contact method” and choose “Email”.

4. Go to “Customer information”, and under “Shipping address phone number” choose “Required”.

D. Changing payment labels
1. Go to the Shopify app store.

2. Search for “Kip” and install it.


Learn more and set it up here: SMART Checkout Rules on Shopify.
3. Open the Shopify admin dashboard and search for Kip.

4. Click “Create rename rule”, then click “Create rule”.


5. Click “Add payment methods” button.

6. In “Or enter your own payment methods” field, enter “DOKU Payment” then click “Add methods”.

7. In the “Rename to” field, insert “online banking/cards/e-wallet”. In the “Conditions” section, select “Always apply rule”.

8. Click “Save”.

9. All done! This is how it will look like during payment checkout.

Please note:
To activate the rename payment methods rules in the Kip app, you need an active paid subscription.
10. About the Shopify platform fee.
- Automatic Monthly Charge: Platform fees will be automatically calculated based on your total successful Shopify transactions for the month, and the charges will be reflected in your next month’s settlement payout. Scenario:
- Transactions made in November → Fee calculated at the end of November → Deducted from December’s settlement payout.
- Fee: The fee is 0.2% of your total successful transaction amount via Shopify. The calculation is based on the gross amount before any Merchant Discount Rate (MDR) deductions.
- Deduction from Settlement: The charge will be automatically deducted from your next settlement payout. Merchants do not need to initiate or approve the deduction.
- Fee Tracking: The platform fee will appear in the monthly statement or settlement report, providing clear visibility and ensuring full transparency in each transaction charges.
- Fallback Handling (If No Settlement): If no payout is available in the following month, the charge will be carried forward to the next settlement where the amount is sufficient for deduction. Once a settlement is processed, the system will automatically deduct any outstanding charges.